Tag Archives: AD FS R2

AD FS – Old Habits (idpinitiatedsignon.aspx)

Usually after building an AD FS/WAP farm I test locally from the Internet and the Intranet using (to-date) a fairly reliable source of verification that the service is up and running. I’m referring to, of course, the IdP sign-in page (../adfs/ls/idpinitiatedsignon.aspx). This offers a simple way of validating login via AD FS.

With Windows Server 2016, this page is no longer surfaced “out-of-the-box”.. if you want to do a SAML 2.0  IdP-initiated sign-on, this functionality will need to be enabled. Otherwise, connecting to the obligatory sign-in page, will produce an error similar to the following:

2016-06-10_18-06-00

Testing from the Web Application Proxy itself directly,  pointing to the AD FS farm, we may see an HTTP 503 Service Not Available error.

Via Powershell, it can be switched back on:

set-adfsproperties -EnableIdpInitiatedSignon $True

Now, before we get too hasty,  knowing that we can turn it back on versus actually turning it back on are two different things 🙂 If it’s directly required, IdP-driven sign-on is a feature of your federation setup, then you may have no choice. For example, certain SaaS/Cloud applications simply don’t support SP-initiated workflow.

For some organizations I’ve worked for though, this page is seen as insidious because it reveals the relying parties configured on your AD FS farm anonymously.

AD FS 2.0

2016-06-16_18-57-06

AD FS 2012 R2

2016-06-16_18-58-34

Going back to AD FS 2.0, customers are often unwilling to float this data anonymously via the sign-in page and want to hide the RP enabled trusts visible on the page, sometimes re-writing the code behind to do so or even hiding it from the browser via obfuscation.

Whatever your view, it’s off by default in Windows Server 2016. Those of a paranoid bent may now breathe …………. in….. out….in… out…. there you go 🙂


Interoperability scenarios with simpleSAMLphp and AD FS


Hello all and Happy New Year!

In this post we’ll look at inter-operability scenarios involving simpleSAMLphp and Active Directory Federation Services (AD FS).

simpleSAMLphp is a native PHP application that provides support for a number of authentication protocols/methods. Its origins lie with the SAML protocol, but it also provides support for a range of other authentication protocols (e.g. WS-Federation, OAuth, LDAP, RADIUS).  It’s a very capable and robust platform that can run on a number of different web surfaces.

In this post we’ll be covering identity federation scenarios with simpleSAMLphp and our usual incumbent: AD FS, getting the two to play nicely together.  We’ll look at both sides of the coin via a:

(a)    simpleSAMLphp Service Provider (SP) / AD FS Identity Provider (IdP) pairing.

(b)   simpleSAMLphp Identity Provider (IdP) / AD FS Service Provider (SP) pairing;


In both cases, setup is applicable to both AD FS 2.0 and AD FS 3.0/2012 R2.

For an introduction to simpleSAMLphp, start here.  It runs on a wide variety of web servers (Apache, Nginx, IIS among others).  In these scenarios we’ll use IIS as our web server for deployment.

clip_image002

The latest PHP libraries can be obtained through the IIS Web Platform Installer. In this setup PHP 5.5.x is used and simpleSAMLphp 1.13.x.

The latest binaries for simpleSAMLphp are available via their website (http://www.simplesamlphp.org).

For SAML integration with AD FS, SSL certificate(s) are required to secure the IIS website(s) and the underlying simpleSAMLphp application(s). This pre-requisite stems from AD FS supporting HTTPS only.  In the test configuration described here, the simpleSAMLphp instances are also published behind an AD FS Web Application Proxy (WAP). The pass-through (reverse) proxy functions of the WAP are then used to publish the simpleSAMLphp IdP/SP endpoints.  On the IIS side, Server Name Indication (SNI) is also enabled. 

The test setup used here comprises four virtual machines:

(i)                  An Active Directory Domain Services (AD DS) and Certificate Services (AD CS) node;

(ii)                An Active Directory Federation Services (AD FS) 2012 R2 Farm node;

(iii)               A Web Application Proxy (WAP) 2012 R2 node;

(iv)              An IIS 8.5 Web server with php loaded as an application. This hosts the simpleSAMLphp Identity Provider (IdP), Service Provider and test applications, under dedicated websites/paths.

clip_image004

The AD DS and AD CS instances provide authentication and the SSL certificates for the IIS web services. On the Web Application Proxy (WAP) a third-party certificate is installed. This goes somewhat against the grain with Microsoft recommendations of using the same certificate pairing on the WAP and AD FS. However, since we’re not using device management/Workplace Join in this scenario, which I believe the requirements stem from, there are no immediate issues.

On our “application server” IIS is installed. Herein, I’ve created four websites (idp1, idp2, site1 and site2), representing two simpleSAMLphp SAML 2.0 identity providers and two simpleSAMLphp service providers. The website configuration can be seen in the below graphic:

clip_image005

In each case the simpleSAMLphp files are unzipped to a folder per function, e.g:

·         c:\inetpub\idp1 and c:\inetpub\idp2 for the SAML identity provider (IdP) root paths

·         c:\inetpub\web1 and c:\inetpub\web2 for the SAML server provider (SP) root paths

In IIS Manager, we can see the folder structure of an exploded simpleSAMLphp configuration for a single instance.

clip_image006

In each instance, under the config folder, a baseurlpath setting in the config.php file is set to indicate the root path for simpleSAMLphp content. By default, this is set to www.  Should we wish to change this, such that the desired path to our simpleSAMLphp is say https://idp1.mydomain.com/auth  rather than the default https://idp1.mydomain.com/www, then we make the change to the baseurlpath from ‘www/’ to auth/ and rename the www folder accordingly. Note the use of the trailing slash that should always be present in the  baseurlpath value.

From a simpleSAMLphp standpoint, there’s a few tweaking steps required before we get going in our test setup.

By default, a secretsalt setting is configured in the config.php file and it’s strongly recommended to change this. This should be a random string, as the salt is used to generate cryptographically secure hashes.

Also, we should consider getting logging working properly. This will reap dividends later when it comes to troubleshooting. As with other settings so far mentioned, logging settings are defined in config.php.

Firstly, debug is enabled via setting:                               

‘debug’ => TRUE,

By default, the logging level is set to SYSLOG.  Here we’ll also switch the logging level to DEBUG and then alter the handler to file. This is done by setting the following values:

     ‘logging.level’         => SimpleSAML_Logger::DEBUG,

       ‘logging.handler’       => ‘file’,


In later sections of the CONFIG.PHP file, the output filename is also specified. This writes to the log folder of the instance.

‘logging.logfile’          => ‘simpleSAMLphp.log’,

This log file lives under the /log folder of the simpleSAMLphp instance. However, simply specifying the file to use is not sufficient for logging under IIS to work.   For that little feat, the IUSR needs to been given modify access to the simpleSAMLphp logfile.

clip_image008

Repeat this process for each instance of simpleSAMLphp running under IIS on your server(s), giving the IUSR account the appropriate permissions.

Once logging has been configured, we can see the benefits of verbose logging as it provides a rich level of detail. Here’s a sample:

<AttributeStatement>

Sep 19 17:30:19 simpleSAMLphp DEBUG [5805446797]       <Attribute xmlns:a=”http://schemas.xmlsoap.org/ws/2009/09/identity/claims&#8221; Name=”http://schemas.microsoft.com/2012/01/requestcontext/claims/x-ms-client-ip&#8221; a:OriginalIssuer=”CLIENT CONTEXT”>

Sep 19 17:30:19 simpleSAMLphp DEBUG [5805446797]         <AttributeValue>172.16.x.6</AttributeValue>

Sep 19 17:30:19 simpleSAMLphp DEBUG [5805446797]       </Attribute>

Sep 19 17:30:19 simpleSAMLphp DEBUG [5805446797]       <Attribute xmlns:a=”http://schemas.xmlsoap.org/ws/2009/09/identity/claims&#8221; Name=”http://schemas.microsoft.com/2012/01/requestcontext/claims/x-ms-forwarded-client-ip&#8221; a:OriginalIssuer=”CLIENT CONTEXT”>

Sep 19 17:30:19 simpleSAMLphp DEBUG [5805446797]         <AttributeValue>212.x.y.5</AttributeValue>

Sep 19 17:30:19 simpleSAMLphp DEBUG [5805446797]       </Attribute>

Sep 19 17:30:19 simpleSAMLphp DEBUG [5805446797]       <Attribute xmlns:a=”http://schemas.xmlsoap.org/ws/2009/09/identity/claims&#8221; Name=”http://schemas.microsoft.com/ws/2012/01/insidecorporatenetwork&#8221; a:OriginalIssuer=”CLIENT CONTEXT”>

Sep 19 17:30:19 simpleSAMLphp DEBUG [5805446797]         <AttributeValue xmlns:tn=”http://www.w3.org/2001/XMLSchema&#8221; xmlns:b=”http://www.w3.org/2001/XMLSchema-instance&#8221; b:type=”tn:boolean”>false</AttributeValue>

Sep 19 17:30:19 simpleSAMLphp DEBUG [5805446797]       </Attribute>

Sep 19 17:30:19 simpleSAMLphp DEBUG [5805446797]       <Attribute xmlns:a=”http://schemas.xmlsoap.org/ws/2009/09/identity/claims&#8221; Name=”http://schemas.microsoft.com/2012/01/requestcontext/claims/x-ms-endpoint-absolute-path&#8221; a:OriginalIssuer=”CLIENT CONTEXT”>

Sep 19 17:30:19 simpleSAMLphp DEBUG [5805446797]         <AttributeValue>/adfs/ls/</AttributeValue>

Sep 19 17:30:19 simpleSAMLphp DEBUG [5805446797]       </Attribute>

Sep 19 17:30:19 simpleSAMLphp DEBUG [5805446797]       <Attribute xmlns:a=”http://schemas.xmlsoap.org/ws/2009/09/identity/claims&#8221; Name=”http://schemas.microsoft.com/2012/01/requestcontext/claims/x-ms-client-user-agent&#8221; a:OriginalIssuer=”CLIENT CONTEXT”>

Sep 19 17:30:19 simpleSAMLphp DEBUG [5805446797]         <AttributeValue>Mozilla/4.0 (compatible; MSIE 7.0; Windows NT 6.3; WOW64; Trident/7.0; Touch; .NET4.0E; .NET4.0C; .NET CLR 3.5.30729; .NET CLR 2.0.50727; .NET CLR 3.0.30729; Tablet PC 2.0; InfoPath.3; MASEJS)</AttributeValue>

Sep 19 17:30:19 simpleSAMLphp DEBUG [5805446797]       </Attribute>

Sep 19 17:30:19 simpleSAMLphp DEBUG [5805446797]       <Attribute xmlns:a=”http://schemas.xmlsoap.org/ws/2009/09/identity/claims&#8221; Name=”uid” NameFormat=”urn:oasis:names:tc:SAML:2.0:attrname-format:basic” a:OriginalIssuer=”https://idp1.mylos.net/www/saml2/idp/metadata.php”&gt;

Sep 19 17:30:19 simpleSAMLphp DEBUG [5805446797]         <AttributeValue>student</AttributeValue>

Sep 19 17:30:19 simpleSAMLphp DEBUG [5805446797]       </Attribute>

Sep 19 17:30:19 simpleSAMLphp DEBUG [5805446797]     </AttributeStatement>


Back in IIS, I’ve elected to employ the services of our friend Server Name Indication (SNI). This is defined on the website. Unlike with AD FS, SNI is an option under IIS J

clip_image010


SNI allows us to run multiple web sites under IIS, using different certificates/domain combinations per website, all bound to a shared single IP address. This makes it possible in this test setup to run with numerous instances of simpleSAMLphp, in identity and service provider roles, all on the same server; without having to deal with the hassle of SSL Host Headers, listener changes, tweaking friendly names on certificates etc.

Web server setup itself is pretty straightforward. For simpleSAMLphp instances, either identity or service provider, we prep the web server with the following steps:

    1. create an A record for the URL in AD DNS, e.g. idp1.mydomain.com
    2. create an A record for the URL in Internet/External  DNS and point this to the IP address/VIP of the Web Application Proxy.
    3. create a website in IIS for simpleSAMLphp and point the configuration to the baseurlpath, of your choice, e.g. c:\inetpub\wwwroot\idp1\www
    4. add an SSL binding on the website, with Require Server Name Indication (SNI) enabled and a host header matching the URL, e.g. idp1.mydomain.com
    5. publish the new website on the reverse proxy (Web Application Proxy) using a pass-through rule
    6. configure the simpleSAMLphp configuration as described later in the post
    7. repeat for each additional new instance

Web Application Proxy (Optional)

In this lab, we’re using the AD FS Web Application Proxy (WAP) to reverse proxy HTTPS traffic to the various simpleSAMLphp endpoints. The following pass-through proxy rules are created.

Name

External URL

Backend Server URL

Pre-authentication

idp1

https://idp1.mydomain.com

https://idp1.mydomain.com

Pass-through

idp2

https://idp2.mydomain.com

https://idp2.mydomain.com

Pass-through

web1

https://web1.mydomain.com

https://web1.mydomain.com

Pass-through

web2

https://web2.mydomain.com

https://web2.mydomain.com

Pass-through


No name/URL translation is performed. Servers idp1 and idp2 are SAML 2.0 identity providers, whilst web1 and web2 are SAML 2.0 service providers.

For integration testing with AD FS, we’ll run through the following scenarios:

1.       configuring AD FS as an Identity Provider and simpleSAMLphp as a service provider

2.       configuring simpleSAMLphp as an Identity Provider and AD FS as a service provider


Scenario 1 – AD FS Identity Provider (IdP) and simpleSAMLphp Service Provider (SP)

Let’s start with simpleSAMLphp in the SAML 2.0 Service provider (SP) role.

For a basic configuration, there are a number of key simpleSAMLphp files we work with. These are:

          config.php

          authsources.php

          saml20-idp-remote.php

In the authentication sources document (authsources.php), various service provider properties are defined. A single authsources.php containing information of all setups can be used and shared across multiple environments, in our case (web1 and web2), or we may elect to store settings separately, using a unique authsources.php per environment .

For expediency, I highlight the use of a common authsources.php. Each authentication module/configuration is represented by its own section in the document.

Here’s an example of two SAML service provider configurations in a test authsources.php:


‘onion1-sp’ => array(

              ‘saml:SP’,


              ‘entityID’ => NULL,

‘idp’ => NULL,

              ‘discoURL’ => NULL,


              ‘redirect.sign’ => TRUE,

              ‘assertion.encryption’ => TRUE,

              ‘sign.logout’ => TRUE,

              ‘privatekey’ => ‘web1.key’,

              ‘certificate’ => ‘web1.pem’,


       ‘attributes’ => array(

      ‘uid’,

       ‘mail’

      ),

       ‘signature.algorithm’ => ‘http://www.w3.org/2001/04/xmldsig-more#rsa-sha256&#8217;,

       ),


);


‘onion2-sp’ => array(

              ‘saml:SP’,


‘entityID’ => NULL,

              ‘idp’ => NULL,

              ‘discoURL’ => NULL,


              ‘redirect.sign’ => TRUE,

              ‘assertion.encryption’ => TRUE,

              ‘sign.logout’ => TRUE,

              ‘privatekey’ => ‘web2.key’,

              ‘certificate’ => ‘web2.pem’,


       ‘attributes’ => array(

      ‘uid’,

       ‘mail’

      ),

       ‘signature.algorithm’ => ‘http://www.w3.org/2001/04/xmldsig-more#rsa-sha256&#8217;,

       ),


);


Notice the different section names (onion1-sp and onion2-sp) and use of separate certificate keypairs (web1 and web2) in each section.  With the entity ID/identifier set to ‘entityID’ => NULL, simpleSAMLphp will handle the naming for the (RP) identifier of that service provider * and an entity ID is generated based on the metadata URL. In the above config, using web1.mydomain.com and web2.mydomain.com as URLs, this would translate to:


https://web1.mydomain.com/www/module.php/saml/sp/metadata.php/onion1-sp

https://web2.mydomain.com/www/module.php/saml/sp/metadata.php/onion2-sp


It’s also perfectly acceptable for you to choose your own identifier in the entityID section, rather than defaulting to NULL.


The IdP section refers to the entity ID (identifier in AD FS terminology) of the IdP that the service provider (SP) should contact. Like the entity ID value of  NULL used for the simpleSAMLphp service provider, this can also be set to NULL for the idp value. Where multiple identity providers exist, then the user will be shown a list of available IdPs to select from.


clip_image012


To corroborate the identity of the service provider, we can (optionally) digitally sign requests and a certificate is required to accomplish this.  Reference to this cert for a service provider (SP) is made in simpleSAMLphp by the privatekey and certificate setting values in the authsources.php.


By default, simpleSAMLphp uses the same certificate for token signing and encryption. The certificates comprising the private key (.key) and public key (.pem) will reside in a cert folder  made off the SimpleSAMLphp base configuration path.


‘privatekey’ => ‘web1.key’,

              ‘certificate’ => ‘web1.pem’,


In this particular configuration, we’ve elected to enable the SP to sign authentication requests (redirect/post), using the the `redirect.sign` =>TRUE option.

While use of signing and encryption is generally considered an unsightly configuration overhead and an optional, use of token signing comes into play with SAML requirements for Single Logout (SLO) and where service providers request specific functionality. As an identity provider, AD FS does expect SAM 2.0 service providers (simpleSAMLphp) to sign logout requests. With this in mind, we elect to use certificates and logout requests are signed by the SP, specifying ‘sign.logout’ => TRUE. 


To satisfy the above requirements, when creating the token signing/encryption certificate(s) for simpleSAMLphp, OpenSSL is used here to generate a certificate using the SHA2 signing algorithm. Here’s an example (2 year validity).

openssl req -x509 -nodes -sha256 -days 730 -newkey rsa:2048 -keyout my.key -out my.pem


If we’re not satisfied with simply signing tokens, then we can also require the content of the token to be encrypted, by requesting encryption using ‘assertion.encryption’ => TRUE.


Our SP is expecting that the AD FS identity provider will provide the attributes uid and mail attributes in the SAML response, as expressed by:


‘attributes’ => array(

      ‘uid’,

       ‘mail’


A SHA2 (SHA256) algorithm is used to sign messages generated by the service provider. 


‘signature.algorithm’ => ‘http://www.w3.org/2001/04/xmldsig-more#rsa-sha256&#8217;


If you’re not up to date on this and as the help text in the configuration files explain, SHA-1 as a signing algorithm is largely being supplanted by use of stronger schemes.


At this point we have the makings of a basic setup authentication-wise. Additionally, simpleSAMLphp needs to be made aware of the AD FS identity provider configuration. This is collected from federation metadata belonging to the AD FS IdP and then stored in the saml20-idp-remote.php file, located in the metadata folder. This file contains configuration details for all remote SAML 2.0 Identity Providers (IdP) known to that service provider.

As we’ll see, the process for pruning metadata and converting it into a simpleSAMLphp friendly format is useable for both service providers and identity providers, thereby applicable for Scenario 2.

Getting the AD FS metadata into a simpleSAMLphp-friendly format is aided by using tools found under the installation page simpleSAMLphp (matching the baseurlpath path). Browsing to the service provider URL, e.g. https://web1.mydomain.com/www shows the simpleSAMLphp installation page.

clip_image014

It’s a good idea to password protect this page. This can be done by editing settings in the config.php file. The settings described therein protect the main admin page and the ensuing metadata pages.

‘auth.adminpassword’          => ‘adminpasswordtobeset’,

‘admin.protectindexpage’      => true,

‘admin.protectmetadata’       => false,


In the above, the installation page is protected and metadata left unprotected to allow automated exchange.

The installation pages allow us to perform a number of tests to prepare and configure the installation.

    1. Review the simpleSAMLphp configuration, installed/enabled modules, PHP versions etc.
    2. Use the built-in tools to parse federation metadata from identity or service providers, e.g. AD FS, subject to role, using the XML to simpleSAMLphp metadata converter.
    3. Validate the configuration by testing configured authentication sources (applies to both identity and service provider roles) via the authentication tab
    4. Observe federation metadata endpoints configured and exposed simpleSAMLphp (valid for both identity and service provider configurations)

The Federation tab on the installation page provides useful information relating to metadata and tools for assisting in the setup of federation trusts. At the foot of the federation screen, note the XML to simpleSAMLphp metadata converter.

clip_image016

Use this to convert federation metadata from remote sources into a simpleSAMLphp friendly format.

clip_image018

Here the metadata from the AD FS SAML 2.0 Identity Provider (IdP) needs to be converted for consumption by the simpleSAMLphp service provider. Download the metadata from AD FS and save it to a text file. Metadata is reachable at:

https://<YOUR FEDERATION SERVICE URL/FederationMetadata/2007-06/FederationMetadata.xml

Open the file in Notepad, copy the contents to the Metadata parser in the browser and then click on the Parse button. This will convert metadata into two formats:

(a)    saml20-sp-remote.php used where AD FS is a remote SAML 2.0 Service Provider

(b)   saml20-idp-remote.php used where AD FS is a remote SAML 2.0 Identity Provider

Since AD FS is the identity provider in this scenario, then we require Option (b). In the converted metadata section of the page, find the section relating to saml20-idp-remote.php and copy the text to clipboard. Open the saml20-idp-remote.php file found in the metadata folder of the IdP configuration, paste the contents, appending the parsed metadata into this file and save it.

NB: I’ve read on the simpleSAMLphp forums that it’s also possible to save files to the metadata folder and reference these in your configuration directly. I’ve not tested this, but if interested it’s worth checking out the simpleSAMLphp github on how this can be done.

Back at the installation page, the federation tab is also worth checking out. It shows the SAML 2.0 SP metadata endpoint information needed to configure the simpleSAMLphp relying party on the AD FS side. Here’s an example of a shared configuration file (authsources.php) representing multiple service providers.

clip_image020

If the simpleSAMLphp URL is reachable by the AD FS IdP, then automatic exchange of metadata is possible. Where the metadata page is password protected, then file exchange of metadata can be performed.

Let’s jump to AD FS now. We’ll add the SP instance, utilizing the “default-sp” label as our SAML 2.0  relying party of interest.

clip_image022

Here our endpoint is reachable across the “Internet” so we can automatically configure the RP by consuming the metadata of the service provider concerned. We create our relying party and simply take the URL mentioned above, parse it into the wizard and AD FS consumes the remote XML document automatically. Should this not be possible, say where the metadata document is password protected, or policies at the SP state otherwise, we can import the file using the AD FS wizard as mentioned earlier.

In the Issuance Transform rules on the Relying Party (RP), we can mine the claims from AD (as our claims provider), to populate the simpleSAMLphp requirements. In this example we:

          use the Send LDAP attributes as claims rule to send E-Mail Address and sAMaccountName as uid and mail, required by this relying party

          use a transform rule to send a Name Identifier in the transient format

clip_image024

As can be seen from the above graphic, we’re using E-Mail Address and sAMAccountName to use as incoming claims to populate in our  outgoingSAML assertion as mail and uid respectively.

Incidentally, when initiating federated logon with the SAML 2.0 protocol, a name identifier is typically used.   AD FS as an identity provider, does not send name identifier information in the format expected by simpleSAMLphp. By default, simpleSAMLphp expects a nameid format using the transient identifier (urn:oasis:names:tc:SAML:2.0:nameid-format:transient).

A quick way to get this going, albeit not conforming to SAML specs, is to transform an incoming claim rule, extracted from our AD provider, to populate as an outgoing name identifier.

clip_image026

In the above UI example an incoming UPN claim is transformed into a transient identifier.

Using the claims rule language, the two rules can be expressed as issuance transform rules on the simpleSAMLphp relying party as:

c:[Type == “http://schemas.microsoft.com/ws/2008/06/identity/claims/windowsaccountname&#8221;, Issuer == “AD AUTHORITY”]

 => issue(store = “Active Directory”, types = (“mail”, “uid”), query = “;mail,sAMAccountName;{0}”, param = c.Value);


c:[Type == “http://schemas.xmlsoap.org/ws/2005/05/identity/claims/upn”%5D

 => issue(Type = “http://schemas.xmlsoap.org/ws/2005/05/identity/claims/nameidentifier&#8221;, Issuer = c.Issuer, OriginalIssuer = c.OriginalIssuer, Value = c.Value, ValueType = c.ValueType, Properties[“http://schemas.xmlsoap.org/ws/2005/05/identity/claimproperties/format”%5D = “urn:oasis:names:tc:SAML:2.0:nameid-format:transient”);


Verifying the RP configuration, we should see both token signing and encryption certificates represented in the appropriate tabs on the relying party, populated among other settings as part of the metadata exchange.

clip_image028

Above, the public key of the token signing certificate, on the Signature tab of the RP.

clip_image030

And on the encryption tab, the public key of the encryption certificate from simpleSAMLphp.

clip_image032

On the Advanced tab, the secure hash algorithm should be set to SHA-256


We’re now good to go for testing the configuration within simpleSAMLphp.

Here I select the Test configured authentication sources on the authentication tab.


clip_image034

Then choose to test the default-sp configuration.

clip_image036

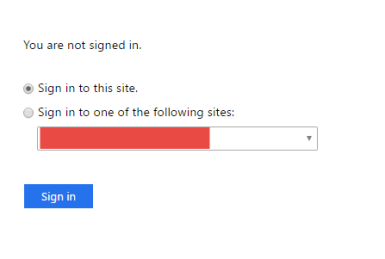
If the idp value for the service provider in authsources.php is set to NULL, then a drop-down list of identity providers will  be presented (otherwise we’re routed automatically to AD FS)

Here’s an example of a drop-down dialog with the Access Onion identity provider selection.

clip_image038

This particular identity provider is running AD FS 3.0/2012 R2. Connecting from the Internet, we’re routed to the Access Onion AD FS instance (behind the Web Application Proxy) and presented with a logon form.

clip_image040

As part of the logon process the appropriate user credentials are posted to AD FS, in this case user mylo.  Sent back in the SAML response is also the e-mail address of the user, read from the mail attribute in Active Directory, with a value of  nomail@accessonion  for this user.  The resultant SAML assertion can be seen in simpleSAMLphp.

clip_image042


Note that the name identifier is not visible on the installation page, although its presence is mandatory.

Click on Logout to check that Single Logout is also functioning and that the two federation partners are configured correctly, signing algorithms are in synch etc.

clip_image044

And we’re logged out, token extinguished/gone.

This is a barebones configuration. Should you wish to employ more expansive configurations, incorporating simpleSAMLphp into the PHP code of your web application (Drupal/Moodle/Joomla etc.), then refer to the simpleSAMLphp website, where there are examples to illustrate this.

Quick note on Name Identifiers

With respect to the earlier comment on the SAML protocol and NameID, when passing a name identifiers of a transient sort, it’s preferable to use an opaque identifier commuted between relying parties that doesn’t reveal the identity of the individual concerned.  To get a better insight into this with respect to AD FS and SAML, I’d suggest reading this MSDN article, as it provides examples on how privacy-bearing claims can be used.

If we wish to use an opaque reference, borrowing from the aforementioned article:

Rule 1: generate a session ID value that can be used as a transient identifier. Add this rule to the claims pipeline.

c1:[Type == “http://schemas.microsoft.com/ws/2008/06/identity/claims/windowsaccountname”] && c2: [Type == “http://schemas.microsoft.com/ws/2008/06/identity/claims/authenticationinstant”]=> add (store = “_OpaqueIdStore”, types = (“http://sts.mydomain.com/internal/sessionid”), query = “{0};{1};{2};{3};{4}”, param = “useEntropy”, param = c1.Value, param = c1.OriginalIssuer, param = “”, param = c2.Value);

Rule 2:  Using the previously generated session ID, map this to the outgoing claim type  as Name ID using the transient identifier and issue the claim.

c:[Type == ”http://sts.mydomain.com/internal/sessionid”] => issue(Type=”http://schemas.xmlsoap.org/ws/2005/05/identity/claims/nameidentifier”, Issuer = c.Issuer, OriginalUser = c.OriginalIssuer, Value = c.Value, ValueType = c.ValueType, Properties[“http://schemas.xmlsoap.org/ws/2005/05/identity/claimproperties/format”]=”urn:oasis:names:tc:SAML2.0:nameid-format:transient”);

Now let’s look at a sample scenario where AD FS is the SAML 2.0 Servicer Provider (SP) and simpleSAMLphp is the SAML 2.0 Identity Provider (IdP)

Scenario 2 – simpleSAMLphp Identity Provider (IdP) and AD FS Service Provider (SP)

In the identity provider (IdP) capacity, simpleSAMLphp supports a number of authentication methods. These include:

·         Local authentication

·         Single LDAP/AD

·         Multi-LDAP

·         RADIUS

·         SQL

·         OpenID (FB/Twitter etc.)

·         Yubikey


That’s quite a diverse set of authentication mechanisms. There are also a number of additional custom modules developed within the community that support even more refined use cases.

We’ll look at a basic setup utilizing local authentication; namely, username/passwords stored in a flat file in the authsources.php file of the simpleSAMLphp IdP. As unglamorous as this might sound, it’s a good starting point for getting a working configuration up and running before mixing it with other more complex setups involving LDAP/RADIUS/SQL etc.

There are a number of files we work with in the identity provider configuration. These are:

          config.php

          authsources.php

          saml20-idp-hosted.php

          saml20-sp-remote.php

On the SAML SP side, AD FS will be using simpleSAMLphp as a claims (identity) provider. We’ll also reuse the simpleSAMLphp SAML 2.0 service provider from Scenario 1 as a relying party (behind AD FS) to illustrate attribute flow.

clip_image046

Here’s the basic logon flow:

1.       User browses to the simpleSAMLphp Relying Party.

2.       User selects the AD FS authentication source and is redirected to AD FS.

3.      Rules logic on the AD FS determines that the user should be directly sent to the simpleSAMLphp claims provider, without showing a realm discovery page.

4.       User is redirected to simpleSAMLphp identity provider for logon where they log on as student

5.       User logs on with local identity (from authsources.php)

6.       User is redirected to AD FS for processing

7.       Claims provider rules are evaluated on the AD FS pipeline

8.       Relying Party rules are evaluated on the AD FS pipeline

9.       User is redirected to the simpleSAMLphp relying party

With all working swimmingly, we’ll end up on the simpleSAMLphp relying party page.

clip_image048

In this logon scenario, we’re using AD FS as Relying Party Security Token Service (RP-STS) in a “headless” capacity. It (AD FS) is not responsible for authentication but must still handle routing of the authentication request to the simpleSAMLphp relying party / test web application.  

In a multiple claims provider scenario, when sending requests via AD FS, we would normally be presented with the Home Realm Discovery (HRD) screen.

clip_image050

As can be seen from the above graphic, with AD FS (via AD) enabled as a claims provider, the “Access Onion” claims provider AND the simpleSAMLphp identity provider are both visible as authentication sources. For this scenario we want to exclusively send logon requests to the simpleSAMLphp identity provider, so the (home) realm selection needs to be suppressed for the simpleSAMLphp relying party/test web application. As mentioned in previous “First Look” posts on AD FS 2012 R2, this can be achieved by declaring the claims provider of choice for the relying party to use for logon in PowerShell.

Set-AdfsRelyingPartyTrust -TargetName “My Relying Party” -ClaimsProviderName @(“SimpleSAMLphp”)

This effectively takes the Access Onion Active Directory out of the mix for logon.

Back to simpleSAMLphp, we begin by enabling the SAML 2.0 identity provider functionality in config\config.php for our identity provider (idp1.mydomain.com) instance.

‘enable.saml20-idp’ => true,

Assigning true to this option enables the SAML 2.0 Identity Provider capability in this instance.

The saml20-idp-hosted.php file in the metadata folder is key for configuring the identity provider. Here’s an example (in bold) calling a local (simpleSAMLphp) authentication method known as example-userpass.

<?php

$metadata[‘__DYNAMIC:1__’] = array(

    ‘host’ => ‘__DEFAULT__’,

    ‘privatekey’ => ‘idp1.key’,

    ‘certificate’ => ‘idp1.pem’,

    ‘auth’ => ‘example-userpass’,

    ‘signature.algorithm’ => ‘http://www.w3.org/2001/04/xmldsig-more#rsa-sha256&#8217;,

    ‘authproc’ => array(1 => array(‘class’ => ‘saml:TransientNameID’,),),

);

You may recognize common aspects of the configuration from the SP scenario applied previously in the authsources.php. Similarly these can be applied to our identity provider configuration in the saml20-idp-hosted.php file.

The identity provider calls the example-userpass authentication scheme from the saml20-idp-hosted.php file.  

The authentication element, expressed as ‘auth’ => ‘example-userpass’, cross-references the appropriate section of the authsources.php file, containing therein a list of users.

‘example-userpass’ => array(

      ‘exampleauth:UserPass’,

      // Give the user an option to save their username for future login attempts

      // And when enabled, what should the default be, to save the username or not

      //’remember.username.enabled’ => FALSE,

      //’remember.username.checked’ => FALSE,


      ‘student:pa$$st@dent’ => array(

             ‘uid’ => array(‘student’),

             ‘mail’ => array(‘student@nomail.com’),

             ‘eduPersonAffiliation’ => array(‘member’, ‘student’),

      ),

      ’employee:3mployEEP&ss’ => array(

             ‘uid’ => array(’employee’),

             ‘mail’ => array(’employee@nomail.com’),

             ‘eduPersonAffiliation’ => array(‘member’, ’employee’),

      ),

      ),


There are two test users: student and employee, with attributes uid and mail populated. As with Scenario 1, to build a federation trust with AD FS, information must be gathered via exchange of metadata to make the trust possible. For the simpleSAMLphp identity providers, extrapolated metadata from the remote AD FS service provider is stored in the saml20-sp-remote.php file in the metadata folder. On the AD FS side, we need to create a relying party trust for our test web application. We’ll re-use the service provider/relying party created in Scenario 1.

To populate the identity provider with the relevant information, the AD FS metadata file needs to be imported to the simpleSAMLphp identity provider (IdP) instance.

Open the installation page of the identity provider, e.g. https://idp1.mydomain.com/www, authenticating where necessary, and select the federation tab.  

Download the AD FS federation metadata from the metadata endpoint and save it to text file.

https://<YOUR FEDERATION SERVICE URL/FederationMetadata/2007-06/FederationMetadata.xml

Open the AD FS metadata file in Notepad, copy the content to the clipboard and then launch the XML to simpleSAMLphp metadata converter on the federation tab.

clip_image051

Paste the contents to the Metadata parser form in the browser and then click on the Parse button.

clip_image053

Scroll down to the saml20-sp-remote.php section of the web page

clip_image055

Copy this section of text to clipboard.

clip_image057

In the identity provider configuration, open the saml20-sp-remote.php file found in the metadata folder and append the parsed metadata held in clipboard to this file. Save the file.

As a SAML service provider, during passive SSO logons, AD FS makes use of a default name identifier of emailaddress. This can be seen from the metadata screenshot (circled in green):

‘NameIDFormat’ => ‘urn:oasis:names:tc:SAML:1.1:nameid-format:emailAddress’,


Given that our identity provider prefers the transient format, this can be altered using Powershell by specifying the required NameID format. More on this in a moment….


From the identity provider (https://idp1.mydomain.com/www) installation page of simpleSAMLphp, the metadata endpoint information is visible on the federation tab. This corresponds to the Entity ID of the identity provider. This URL is used to configure the claims provider on the AD FS side.

clip_image059

Should the simpleSAMLphp IdP endpoints be visible to support online exchange of metadata with AD FS, then the claims provider can be configured automatically. Where metadata is password protected, or the published path of the endpoint is not reachable (for security reasons), then manual exchange of metadata via file will be necessary.

We now have sufficient information to create the claims provider on the AD FS side. In the Add Claims Provider Trust wizard, the above-mentioned URL is used.

clip_image061

As always I recommend the use of PowerShell over the UI for automating this process. While the initial learning curve/overhead is somewhat higher, it will reduce the margin for human error and also provides documented evidence and a path on how installations/configurations are performed.

Since we are hand-waving authentication to simpleSAMLphp as claims provider, any incoming attributes will need to be processed by AD FS as part of the logon process at both the claims provider and relying party.

Firstly, we’ll override the default AD FS behavior of using SAML 1.1 name identifiers (mail) in favor of the transient identifiers mentioned earlier. To do this the expected name identifier required by the identity provider (simpleSAMLphp) can be stated in PowerShell.


Set-AdfsClaimsProviderTrust -TargetName “simpleSAMLphp Identity Provider” -RequiredNameIDFormat “urn:oasis:names:tc:SAML:2.0:nameid-format:transient”


The following SAML attributes, expressed as claims rules on the claims provider handler, are defined:


1.       Transient Name identifier

c:[Type == “http://schemas.xmlsoap.org/ws/2005/05/identity/claims/nameidentifier&#8221;, Properties[“http://schemas.xmlsoap.org/ws/2005/05/identity/claimproperties/format”%5D == “urn:oasis:names:tc:SAML:2.0:nameid-format:transient”]

 => issue(claim = c);

2.       uid

c:[Type == “uid”]

 => issue(claim = c);

3.       mail

c:[Type == “mail”]

 => issue(claim = c);


In a completed configuration, if we were to enable debug and analytics on the AD FS server, we can see the claims processed via Event ID 1000 in the AD FS Debug tracing logs. Note the transient name identifier claim type value of _60b434c232f5cc7048fb85d80ea4c8775d38489f90 being passed when logging on using a test (student) user.


ClaimType http://schemas.xmlsoap.org/ws/2005/05/identity/claims/nameidentifier Value _60b434c232f5cc7048fb85d80ea4c8775d38489f90 ValueType http://www.w3.org/2001/XMLSchema#string Issuer https://idp1.mydomain.com/www/saml2/idp/metadata.php OriginalIssuer https://idp1.mydomain.com/www/saml2/idp/metadata.php Property[http://schemas.xmlsoap.org/ws/2005/05/identity/claimproperties/format] urn:oasis:names:tc:SAML:2.0:nameid-format:transient Property[http://schemas.xmlsoap.org/ws/2005/05/identity/claimproperties/spnamequalifier] http://sts3a.mydomain.com/adfs/services/trust ClaimType uid Value student ValueType http://www.w3.org/2001/XMLSchema#string Issuer https://idp1.mydomain.com/www/saml2/idp/metadata.php OriginalIssuer https://idp1.mydomain.com/www/saml2/idp/metadata.php Property[http://schemas.xmlsoap.org/ws/2005/05/identity/claimproperties/attributename] urn:oasis:names:tc:SAML:2.0:attrname-format:basic ClaimType mail Value student@nomail.com ValueType http://www.w3.org/2001/XMLSchema#string Issuer https://idp1.mydomain.com/www/saml2/idp/metadata.php OriginalIssuer https://idp1.mydomain.com/www/saml2/idp/metadata.php Property[http://schemas.xmlsoap.org/ws/2005/05/identity/claimproperties/attributename] urn:oasis:names:tc:SAML:2.0:attrname-format:basic ClaimType eduPersonAffiliation Value member ValueType http://www.w3.org/2001/XMLSchema#string Issuer https://idp1.mydomain.com/www/saml2/idp/metadata.php OriginalIssuer https://idp1.mydomain.com/www/saml2/idp/metadata.php Property[http://schemas.xmlsoap.org/ws/2005/05/identity/claimproperties/attributename] urn:oasis:names:tc:SAML:2.0:attrname-format:basic Value student Property[http://schemas.xmlsoap.org/ws/2005/05/identity/claimproperties/attributename] urn:oasis:names:tc:SAML:2.0:attrname-format:basic 


Wonderful J


Meanwhile, we need to ensure on the relying party/test web application, our simpleSAMLphp relying party from Scenario 1, that the appropriate rules are applied to ensure that claims originating from the issuer (simpleSAMLphp Identity Provider) are evaluated.

The two test users defined in config.php of the identity provider will emit two SAML attributes of interest for AD FS to process (uid and mail):

‘student:studentpass’ => array(

             ‘uid’ => array(‘student’),

             ‘mail’ => array(‘student@nomail.com’),

             ‘eduPersonAffiliation’ => array(‘member’, ‘student’),

      ),

      ’employee:employeepass’ => array(

             ‘uid’ => array(’employee’),

             ‘mail’ => array(’employee@nomail.com’),

              ‘eduPersonAffiliation’ => array(‘member’, ’employee’),

To reiterate, we wish to pass identity-specific information originating from a SAML 2.0 identity provider (simpleSAMLphp), via AD FS as a SAML 2.0 Service Provider (RP-STS), to our test SAML 2.0 Service Provider/Relying Party (simpleSAMLphp). 

For the relying party, the fact that I’m using simpleSAMLphp (from Scenario 1) is merely for expediency. The application/relying party concerned may well be another application, i.e. a Cloud/SaaS or on-premise offering. However, the attributes mentioned above need to be passed by the identity provider through AD FS to the relying party application. For those not experienced with using claims providers with AD FS, this can sometimes be a little confusing.

In Scenario 1, we created a simpleSAMLphp relying party that surfaced claims from the local Active Directory as the claims provider (identity provider) using the Send LDAP Attributes as Claims claim ruleset.  This particular ruleset is not applicable to claims emitted for our simpleSAMLphp claims provider. Let’s look at the custom claims rule again:

c:[Type == “http://schemas.microsoft.com/ws/2008/06/identity/claims/windowsaccountname&#8221;, Issuer == “AD AUTHORITY”]

 => issue(store = “Active Directory”, types = (“mail”, “uid”), query = “;mail,sAMAccountName;{0}”, param = c.Value);


Note the reference to AD AUTHORITY. This is specifically targeting the local home Active Directory as the issuer for the claim.  When authentication is handled through the simpleSAMLphp identity provider, this rule is ignored.

Our test application (the same one used in Scenario 1) is expecting attributes uid and mail to be passed from AD FS.  We could add a single rule that states passing all claims rules to be processed by the relying party, covering the claims from the identity provider described above.

c:[]

 => issue(claim = c);


This satisfies the requirement of passing the name identifier, uid and mail attributes from the simpleSAMLphp identity provider, but it also passes additional information from the AD FS RP-STS to the relying party.

clip_image063

Note the additional claims such as client IP, forwarded (NAT) client IP, user agent etc.

Alternatively, we could define three pass-through rules, expressly bound to the simpleSAMLphp identity provider through the issuer value.  Instead of sending all claims values, we only emit claims specific to that identity provider for the attributes concerned on the relying party rules.

1.       Name Identifier

c:[Type == “http://schemas.xmlsoap.org/ws/2005/05/identity/claims/nameidentifier&#8221;, Properties[“http://schemas.xmlsoap.org/ws/2005/05/identity/claimproperties/format”%5D == “urn:oasis:names:tc:SAML:2.0:nameid-format:transient”, Issuer == “https://idp1.mydomain.com/www/saml2/idp/metadata.php”%5D => issue(claim = c);

2.       uid

c:[Type == “uid”, Issuer == “https://idp1.mydomain.com/www/saml2/idp/metadata.php”%5D

 => issue(claim = c);

3.       mail

c:[Type == “mail”, Issuer == “https://idp1.mydomain.com/www/saml2/idp/metadata.php”%5D

=> issue(claim = c);

Here we see the difference from the simpleSAMLphp relying party/web application in terms of claims/attributes emitted in the SAML response.

clip_image065

OK.. that’s it for this post. Feel free to post questions and and I’ll get back to you as soon as possible.

As ever: test, play and test a little more Smile


MFA Conditional Access Policies in AD FS 2012 R2

Hello again. The previous Multi-Factor Authentication (MFA) post on User Certificates provided an opportunity to expand and look at  some of the more interesting scenarios for MFA conditional access.  This “interest”, if I may call it that, stemmed from playing around with MFA over the last few months and looking at the role of conditional access polices therein.

Ramiro Calderon wrote a great article on MFA policy here and it comes highly recommended. As he mentions in his post, the AD FS claims engine computes MFA authentication requests (defined via the AD Management UI) in a logical OR fashion. This can be initially a little confusing and we’ll take a look at some more creative use of MFA policies, to handle more flexible access scenarios in R2.

MFA Primer

To make use of MFA, an MFA provider is required. In a vanilla AD FS R2 setup, this is limited to certificate authentication using client certificates (see previous post). For other MFA options, check with your favorite 2FA vendor to see if they’ve written an MFA adapter for AD FS R2.

In the global authentication policy, the MFA provider needs to be enabled.

image

Let’s have a look at what happens when MFA is enabled through the AD FS Management UI. MFA policies can be triggered either globally (applicable to all relying parties), or on the relying party itself.

In the example below, MFA is required for securing access to applications outside of the organization, what Microsoft call Extranet use.

image

Users connecting from outside the corporate network will be prompted after successful AD username/password authentication by the MFA handler.

When the MFA policy is set globally, this can be seen in PowerShell via the Get-AdfsAdditionalAuthenticationRule

c:[Type == "http://schemas.microsoft.com/ws/2012/01/insidecorporatenetwork", Value == "false"] => issue(Type = "http://schemas.microsoft.com/ws/2008/06/identity/claims/authenticationmethod", Value = "http://schemas.microsoft.com/claims/multipleauthn");

If a global authentication policy is not specified, but the policy is enabled in a relying party rule, then an additional authentication rule, defined on the RP, is evaluated. This allows for a more refined use of policy and I’ll show examples of this, by way of scenarios, later in the post.

The AD FS Management UI is sufficient for applying the use of MFA in most single “context” access scenarios. By this I mean, we are able to enforce the requirement of MFA to satisfy policies, that stipulate additional authentication is required by use of one of either user/group, device or location. For example, if we determine that a MFA policy needs to be used by location only, e.g. Extranet, we simply select the Extranet location checkbox. All users connecting from outside of the corporate network must then use MFA. Conversely, if we want to enforce MFA for a specific subset of users/groups, irrespective of their location (Extranet/Intranet), by adding them via the users/groups option in the UI, this can be  also be set. Finally, we can also specify that unregistered or registered devices (a la Workplace Join) need to use MFA, via the devices checkboxes. The fact that these policies may also be applied independently on a per relying party basis, often satisfy basic access policy needs.

The challenge arises when dealing with a combination of policy, for example, when stating an MFA requirement by device and by location.

image

AD FS will now trigger MFA when an unregistered device (non-workplace joined) connects to AD FS AND also when users are connecting from the Internet  The policies are evaluated independently and we may unwittingly be enforcing MFA for a registered device in a Workplace Join scenario, when the desired outcome was actually to ensure that a single authentication factor (the device certificate paired with the user concerned) was sufficient for access from the outside. This is the logical OR behavior that Ramiro refers to in his post.

Similar behavior can be observed if the following settings are made.

image

Here we have a specific user/group requiring MFA and also the location (Extranet) checkbox is checked. Users who are members of the GU-SEC-ADFS-MFA group must always use MFA, irrespective of their location AND other users, connecting from outside of the corporate network, will be challenged by the MFA handler. Again, if the intention was to enforce MFA for a combination of outcomes; namely, by group and location outside, then this is not the outcome.

Rules  are evaluated independently when set via the UI. Given that requirements via the UI operate this way, if there is a requirement to enforce MFA via policy where:

      • it’s an unregistered device AND
      • connecting from the Internet
                OR in the second example where:
              • user is member of group X AND
              • connecting from the Internet

            The AD FS Management  UI doesn’t support this arrangement. Instead, more refined policies can be handled with PowerShell, using combinations of authentication rules. As with the UI, this can be expressed either as a global authentication policy applicable to all relying parties (Set-AdfsAdditionalAuthenticationRule) or MFA policies defined on a per relying party basis (Set-AdfsRelyingPartyTrust).  I’ll use the latter to drum up examples of setting finer-grained access rules in the scenarios that follow. More work for us admins, but greater flexibility to boot…

                    Scenario A: Externally connecting workplace joined device (registered user)

              Requirement: Registered users on Workplace Join devices connecting from outside the corporate Internet may authenticate using the device authentication certificate. All other users/devices must use MFA.

            $rp = Get-AdfsRelyingPartyTrust –Name "WIF Test Application"
            Set-AdfsRelyingPartyTrust –TargetRelyingParty $rp –AdditionalAuthenticationRules ‘c: [Type == "
            http://schemas.microsoft.com/ws/2012/01/insidecorporatenetwork", Value == "false"] && [Type == "http://schemas.microsoft.com/2012/01/devicecontext/claims/isregistereduser", Value == "false"] => issue(Type = "http://schemas.microsoft.com/ws/2008/06/identity/claims/authenticationmethod", Value = "http://schemas.microsoft.com/claims/multipleauthn");’

              Requirement: Users who are members of Group X are exempt from a general policy stipulating use of MFA when connecting from the outside of  the network. All other users must use MFA. Note: We flip the behavior with the Group SID claim use in Scenario B by using the NOT EXISTS evaluation.

              $rp = Get-AdfsRelyingPartyTrust –Name "WIF Test Application"
              Set-AdfsRelyingPartyTrust –TargetRelyingParty $rp –AdditionalAuthenticationRules ‘exists([Type == "
              http://schemas.microsoft.com/ws/2012/01/insidecorporatenetwork", Value == "false"]) && NOT EXISTS ([Type == "http://schemas.microsoft.com/ws/2008/06/identity/claims/groupsid", Value == "S-1-5-21-Insert your Group SID here"]) => issue(Type = "http://schemas.microsoft.com/ws/2008/06/identity/claims/authenticationmethod", Value = "http://schemas.microsoft.com/claims/multipleauthn");’

              Scenario D: MFA using a custom evaluation rule

              Requirement: The Azure Sprout organization is using “vanity” UPNs to enforce MFA for non-standard UPN suffixes. Corporate users with an @azuresprout.com UPN suffix may use single factor (forms) authentication from the outside. All other UPN suffixes in the “organization” must use MFA.

              $rp = Get-AdfsRelyingPartyTrust –Name "WIF Test Application"
              Set-AdfsRelyingPartyTrust –TargetRelyingParty $rp –AdditionalAuthenticationRules ‘NOT EXISTS([Type == "
              http://schemas.xmlsoap.org/ws/2005/05/identity/claims/upn", Value =~ "^.*@azuresprout\.net$"]) => issue(Type = "http://schemas.microsoft.com/ws/2008/06/identity/claims/authenticationmethod", Value = "http://schemas.microsoft.com/claims/multipleauthn&quot;);’

              Scenario E: MFA based on custom claims extrapolated from an attribute store

              Requirement: An SQL attribute store is used to augment claims when accessing a business application. Values extracted  from the store are to be used as triggers for MFA.

              On the relying party, we connect to an attribute store and populate an sqlrole claim, based on running a stored procedure to find the user and the appropriate access information for user on application FOO.

              c:[Type == "http://schemas.microsoft.com/ws/2008/06/identity/claims/windowsaccountname"%5D => add(store = "SQL Attribute Store", types = ("http://schemas.microsoft.com/ws/2008/06/identity/claims/sqlrole"), query = "EXEC dbo.GET_ACCESSTOKEN @UserID={0},@AppCode=’FOO’", param = c.Value);

            Next, on the RP pipeline, we define the MFA requirement based on value returned in the sqlrole claim .

            $rp = Get-AdfsRelyingPartyTrust –Name "WIF Test Application"
            Set-AdfsRelyingPartyTrust –TargetRelyingParty $rp –AdditionalAuthenticationRules  ‘c:[Type == http://schemas.microsoft.com/ws/2008/06/identity/claims/sqlrole”, Value =~ "<Whatever the response we’re expecting for MFA trigger>"]) => issue(Type = "http://schemas.microsoft.com/ws/2008/06/identity/claims/authenticationmethod", Value = "http://schemas.microsoft.com/claims/multipleauthn&quot;);’ 

              The latter scenario is a little more unusual, but I’ve used it to highlight what is possible (as with Scenario D) outside of the normal conventions provided by the UI.

              As a sneak peek into the new Window Server “10” release, it appears that Microsoft have expanded authentication support and making the nuances of policy-based access control more accessible to the end user, through the use of a new policy template editor, made available to the AD FS administrator.. more on this and another ADFS “stuff” to come…

              Here’s a snippet of the new rules editor from the pre-release.

            image

            MFA with Client Certificates in ADFS 2012 R2

            There have been questions on this subject posted recently to comments and also on the TechNet forums, so I just wanted to quickly write up something about use of client certificates in the MFA (secondary) slot in AD FS 2012 R2.  You may recall from earlier AD FS R2 posts, that we used virtual smart card and smart card as examples. Let’s broaden that to include “soft” client certificates as an MFA/secondary provider. This functionality is provided “out-of-the box” in AD FS 2012 R2. An Active Directory Certificate Services (AD CS) infrastructure is required to serve up certificates for enabling users for PKI.

            In this post, I’ll be using an Active Directory Certificate Services (AD CS) role from Windows Server 2012 R2 as the Certification Authority (CA). I won’t be explaining the CA setup, beyond the templates used, as there’s been plenty of ink expended on this topic already on the Internet.  A Windows 2003/2008/2012 CA setup will suffice for the activities  concerned here.

            Testing was done with client certificates from a Windows 8.1 clients using:

            • a non domain-joined machine, via Certificate Enrollment (Policy) Web Services and Microsoft Management Console (MMC)
            • a domain-joined machines, via an auto-enrollment policy User-Context GPO.

            In AD Certificate Services (AD CS) a duplicate of the default User certificate template was made (called User V2). Under the Application Policy, the policy is limited to Client Authentication.

            image

            For domain-joined clients, we can enable auto-enrollment via the security tab of the template. Here we see a group called GU-SEC-ADCS-Managed, which is given the necessary read, enroll and autoenroll permissions and we can add users to that security group.

            image

            To enable auto-enrollment for domain-joined clients we need to activate a policy to accomplish this. Against best practices (boo), but for expediency (mine.. yay!), I enable the policy in the Default Domain Policy GPO. The actual settings can be find under Windows Settings|Security Settings|Public Key Policies. Select the Certificate Services Client – Auto Enrollment object and enable the Configuration model section as seen below.

            image

            For the non-domain joined client, read and enroll permissions are given to a group I’ve called GU-SEC-ADCS-Workgroup. The test user, who will be a member of that group, can request the UserV2 certificate template via the Certificates|User MMC plug-in using AD CS Certificate Enrollment Web Services. Again, I won’t be describing how to setup enrollment web services. If you need help, just post in the comments section.

            With Certificate Services, we need to make available the template available to both sets of clients, by enabling the template in the Certification Authority MMC plugin – Certificate Templates|New|Certificate Template to Issue.

            image 

            In a correctly configured setup, domain-joined clients will obtain a certificate on the next GPO refresh cycle for the user (e.g. logon).

            As mentioned previously, I’m joining non-domain joined clients via enrollment web services using the MMC snap-in in Windows 8.  In the Certificates|User context of the MMC snap-in, we request a new certificate. In this particular test setup, there are three certificate templates visible for enrollment by the client from the CA:

            image

            User V2 is the template we just created for use for “soft” client certificates.The certificate services enrollment point in this example is configured for Username/Password authentication. Logon is done with a test AD user account training@azuresprout.net, who is a member of the GU-SEC-ADCS-Workgroup and authorized with the enroll permission.

            image

            Once that’s done, a client certificate is installed in the user context.

            image

            On the AD FS side of things, let’s assume we now need to apply MFA for users (with client certificates) coming from the Internet. Before we jump into the actual AD FS settings, it’s worth mentioning that any firewalls in front of the Web Application Proxy (WAP) will need to allow port 49443/TCP inbound, as this is the port the AD FS Smartcard Authentication Service listens on.

            We see evidence of this requirement in the Windows Firewall snap-in. AD FS creates a firewall rule during the installation allowing 49443/TCP inbound.

            image

            image

            In AD FS Global Authentication Policy for MFA, we enable certificate authentication:

            image

            Note that at this point, I’m not enforcing the use of MFA globally, rather enabling it for use at a lower level on a relying party rule, for more incremental control. Whether to go for global or granular policies really boils down to a question of fit and the use cases may need to support. .

            On a test Windows Identity Foundation (WIF) relying party, MFA is enforced for externally connecting users.

            image

            Logging on to the relying party, we hit the primary authentication handler (AD FS forms), enter our username/password.

            image

            Connecting from the Internet, with MFA enabled, the secondary (MFA) authentication handler kicks in and we’re presented with a login popup.

            image

            In the above graphic, we have an option to login with a virtual smart card (top) and an X509 client certificate (bottom). Click on the certificate and AD FS will authenticate the user using secondary authentication (MFA).

            The enrolled certificate is stored by AD CS in the userCertificate attribute of the user object within AD. This attribute contains the DER-encoded X509v3 certificates issued to the user. We can lookup the necessary certificate reference, for example, in the Attribute Editor of AD Users & Computers (ADUC).

            image

            This is a multi-valued attribute.

            image

            One thing that can be useful, should you be working with multiple certificates for a given user, is being able to cut and paste the hex encoded value into Notepad, save it, then check to see what the certificate value corresponds to using CERTUTIL.

            certutil –decodehex mylo.hex mylo.cer

            We can then open the .cer file to see what the certificate is.

            Returning to the test claims applications (having logged in successfully0, we pass all claims processed via an issuance transform rule of c:[]  => issue(claim = c);
            We can see the relevant authentication method references processed during primary and secondary logon.

            image

            As I mentioned in an earlier post, the nice thing here is that you can use the Enhanced Key Usage (EKU) claim emitted for both client certificates and smart cards / virtual smartcards to moderate access to resources as you see fit.

            Looking at a user authenticating with a client certificate, the following EKU is emitted as a claim.

            image

            Smart cards also emit the smart card EKU

            image

            Access can also be further graded by using custom OIDs to differentiate between levels of access based on the type of MFA being used and the EKU value.

            Use of certificates in the MFA slot in R2 (I suspect) are really geared for use in a true two-factor (2FA) authentication capability, i.e. smart cards. While the use of a client certificate does offer value in offering richer access possibilities, this is not 2FA, in that it does not satisfy the mantra of “something I have and something I know”. Instead, this is more akin to 1.5FA.

            To finish up, Microsoft recently added support in Windows 7 for domain-joined clients via a hotfix. I’ll attempt to throw out a quick post on this, but in the meantime,  I’ll be following up by looking at conditional access policies for MFA.

            As always, thanks for reading and if you have any questions, please post a comment and I’ll do my best to answer quickly.

            Exchange 2013 SP1, Outlook Web App (OWA) and AD FS

            It’s over a year now since the last Outlook Web App article about integrating OWA with ADFS. In that post we explored the use of claims-based authentication with OWA in a Proof of Concept using WIF 3.5 and FedUtil. This was an unsupported setup in Microsoft eyes and, in the meantime, with the release of Windows Server 2012 R2, opportunities for supporting Exchange web applications such as OWA,  have arisen. The first, provided support via the use of a non-claims aware web application in AD FS R2 using Kerberos Constrained Delegation (KCD), utilizing the new Web Application Proxy (WAP) feature. The recent release of Exchange 2013 SP1 further expands OWA support, including native support for AD FS in the Exchange product, with claims-based authentication now possible for Outlook Web App (OWA) and the Exchange Admin Center (EAC).

            To get started, I’ll refer you to a Technet article here that provides a step-by-step. I used this article as a starting point for setting up OWA/EAC with AD FS R2. These two application endpoints in Exchange (OWA and ECP) need to be represented as relying parties within AD FS.

            Here’s an excerpt of the PowerShell rules required for creating the RPs:

            Add-ADFSRelyingPartyTrust -Name “Outlook Web App” -Enabled $true -Notes “This is a trust for https://mail.mydomain.com/owa” -WSFedEndpoint https://mail.mydomain.com/owa -Identifier https://mail.mydomain.com/owa -IssuanceTransformRules $IssuanceTransformRules -IssuanceAuthorizationRules $IssuanceAuthorizationRules

            Add-ADFSRelyingPartyTrust -Name “Exchange Admin Center (EAC)” -Enabled $true -Notes “This is a trust for https://mail.mydomain.com/ecp” -WSFedEndpoint https://mail.mydomain.com/ecp -Identifier https://mail.mydomain.com/ecp -IssuanceTransformRules $IssuanceTransformRules -IssuanceAuthorizationRules $IssuanceAuthorizationRules

            The AD User and Group SIDs, together with UPN also need to be defined for each of the Exchange Relying Party applications in the form of custom claims rules: Windows Account Name (sAMAccountName)

            c:[Type == “http://schemas.microsoft.com/ws/2008/06/identity/claims/windowsaccountname”, Issuer == “AD AUTHORITY”] => issue(store = “Active Directory”, types = (“http://schemas.microsoft.com/ws/2008/06/identity/claims/primarysid”), query = “;objectSID;{0}”, param = c.Value);

            Group SID (enumarate group membership)

            c:[Type == “http://schemas.microsoft.com/ws/2008/06/identity/claims/windowsaccountname”, Issuer == “AD AUTHORITY”] => issue(store = “Active Directory”, types = (“http://schemas.microsoft.com/ws/2008/06/identity/claims/groupsid”), query = “;tokenGroups(SID);{0}”, param = c.Value);

            User Principal Name (UPN)

            c:[Type == “http://schemas.microsoft.com/ws/2008/06/identity/claims/windowsaccountname”, Issuer == “AD AUTHORITY”] => issue(store = “Active Directory”, types = (“http://schemas.xmlsoap.org/ws/2005/05/identity/claims/upn”), query = “;userPrincipalName;{0}”, param = c.Value);

            On the Exchange side, via PowerShell, we specify the Relying Party Identifiers via the AdfsAudienceUris parameter and must also provide the token signing certificate thumbprint from the AD FS server.

            $uris = @(“https://mail.mydomain.com/owa”,”https://mail.mydomain.com/ecp”) Set-OrganizationConfig -AdfsIssuer “https://adfs.contoso.com/adfs/ls/” -AdfsAudienceUris $uris -AdfsSignCertificateThumbprint “TOKEN SIGNING CERTIFICATE THUMBPRINT”

            Don’t forget to import the token signing certificate into the Trusted Root Certificate Authorities container of your Exchange servers, otherwise you may fall foul of the following error logging on to your mailbox.

            clip_image002

            The source in pinpointing the problem here, lies in the query string of the error message https://external.mydomain.com/owa/auth/errorfe.aspx?msg=WrongAudienceUriOrBadSigningCert.

            In this (my) case, the token signing certificate had not been added to the Exchange servers as a trusted cert. Equally, the wrong Audience URI can present a configuration problem. It commonly arises when a unnecessary trailing slash is added to the Relying Party Identifier when configuring in AD FS, e.g. https://mail.mydomain.com/owa/. s something to keep an eye on. The correct RP identifier would be https://mail.mydomain.com/owa.

            I’ve not yet tested setting up Exchange 2013 SP1 under AD FS 2.0, but there’s nothing untoward going on here to suggest that using it as your identity provider is not possible. If you’re running under AD FS Windows Server 2012 R2 then the Web Application Proxy (WAP) adopts the proxy role for external access scenarios and also supports host name translation. For example, I make use of https://external.mydomain.com as an external URL and map this to the internal name of https://mail.mydomain.com. Be aware that matching of path-based names is not supported in the current release of the WAP, so mixing path names between externally and internally published resources is a no-no.

            To illustrate this, let’s look at an example of an OK configuration:

            Add-WebApplicationProxyApplication -BackendServerUrl ‘https://mail.mydomain.com/owa/’ -ExternalCertificateThumbprint ‘DD94E2ABAA123C6B6009CB42F16CE892AF96A47C’ -ExternalUrl ‘https://external.mydomain.com/owa/’ -Name ‘OWA’ -ExternalPreAuthentication ADFS -ADFSRelyingPartyName ‘Outlook Web App’

            Whereas, this is a non-workable configuration.

            Add-WebApplicationProxyApplication -BackendServerUrl ‘https://mail.mydomain.com/owa/’ -ExternalCertificateThumbprint ‘DD94E2ABAA123C6B6009CB42F16CE892AF96A47C’ -ExternalUrl ‘https://external.mydomain.com/mail/’ -Name ‘OWA’ -ExternalPreAuthentication ADFS -ADFSRelyingPartyName ‘Outlook Web App’

            Note the use  in publishing of the same literal path  https://external.mydomain.com/owa/ in the first example, versus a rewritten one in the second https://external.mydomain.com/mail/.

            If you’re contemplating the use of AD FS 2.0, then clearly host-name translation is not something that the AD FS 2.0 proxy brings to the table. Alternatively, a suitably equipped front-end load balancer may also fulfill that role.

            On the subject of load balancers, this rather conveniently brings me back to new features in AD FS R2. Server Name Indication (SNI) was mentioned in the “First Looks” articles about AD FS R2 and it’s worth checking that your current load balancer/reverse proxy in front of AD FS supports SNI and is supported/enabled on the device concerned. This is becoming a pain point for many, as evidenced by various posts on the Technet forums. The move to kernel-mode (HTTP.SYS) in R2 mandates the use of SNI. Therefore, it’s worthwhile checking that:

            • your friendly neighbourhood load balancer/device in front of AD FS supports SNI
            • clients and user agents support SNI and you’re not inadvertently locking them out
            • (08/04) SSL termination endpoints (e.g. load balancer / 3rd-party reverse proxies) in front of AD FS  may be affected by the recent heartbleed bug (http://heartbleed.com), exposing vulnerable OpenSSL libraries and certificates used on those devices. Microsoft infrastructure, employing Secure Channel (SChannel)  not affected, may inadvertently become so through SSL termination endpoints on the aforementioned devices in front of AD FS. More information can also be found here (http://www.kb.cert.org/vuls/id/720951)

            Accessing the OWA URL, via https://external.mydomain.com/owa and the OWA Relying Party redirects the user to AD FS for logon. In a default AD FS R2 configuration, this equates to forms-based authentication for external users.

            clip_image003

            Users accessing OWA internally, access https://mail.mydomain.com via the farm using Integrated Windows Authentication (IWA). As usual when connecting to the farm, the URL for the federation service needs to be added to the Local Intranet Zone within IE and any corresponding configuration changes made to support Kerberos for other browsers.

            At this point, optional use of a clams provider (connecting to the local AD) or an MFA provider in R2 could also come into play to provide stronger authentication, should it be required. Having successfully authenticated via AD FS, we gain access to the user mailbox. image

            The Exchange Control Panel (ECP) was also configured as a relying party within AD FS and within the Exchange configuration. Accessing the Exchange Admin Center remotely, with the Exchange Organization Administrator mylo, we can see the gamut of administrative console options available under federated logon.

            image

            This is one of those scenarios where it might be a good idea to apply stronger authentication (MFA)  to privileged user accounts when accessing the Exchange Admin Center. We can do this by applying policy-based access on the AD FS R2 server.

            In the next post, I’ll be taking a look at strong authentication access scenarios using ActiveSync and Lync (primarily with mobile clients), before completing Part 3 of the First Looks series of AD FS R2.

            First Impressions – AD FS and Windows Server 2012 R2 – Part I

            In the next few posts, I wanted to take a look at the changes to be found in Windows Server 2012 R2 with respect to Active Directory Federation Services (AD FS).  At TechEd Europe, I was fortunate enough to chat with some of the folks from the Active Directory team about the new enhancements and to cover them here in a little more detail. As you may have read, there are a significant number of changes in the R2 version and I’ll spread coverage of this over a number of posts.

            Part 1

                      Architecture Changes

                      Workplace Join / Bring Your Own Device (BYOD)

            o   Windows 8.1

            o   iOS Devices

                      Web Application Proxy

                      Extranet soft account lockout policies

                      Lost Device Protection

            Part 2

                     UI Changes

                     Access Scenarios

                     Authentication changes

            o  Multi-Factor Authentication

            o   Context-based Authentication

            o   Claims/Non-claims aware applications

            o   Policy-based Evaluation

            Part 3

                      OATH2 support

                      Work Folders

                      Better event handling / reporting

                      Server Core

                      Other stuff undiscovered J

            Architecture Changes

            The use of IIS with AD FS in Windows Server 2012 R2 has been eschewed in favour of a move to kernel-mode (HTTP.SYS). The motive, highlighted in discussions at TechEd, is to improve performance, provide greater sign-in customization options and to assuage concerns for co-locating AD FS and AD DS on the same server (IIS on domain controllers has been a long-standing security no-no).  As the use of federation services goes more mainstream in everyday use with Windows 8.1, this shift is understandable and an important design consideration.  With the new kernel-mode approach, support for running under server core also appears as an option in the new release.

            image

            From a basic architecture standpoint and overview, the AD FS proxy has been supplanted by a role known as the Web Application Proxy, servicing connections for external clients. The user interface (UI) through the migration to kernel mode is also significantly changed. Authentication undergoes a radical overhaul with a Multi-Factor Authentication (MFA) Adapter available for plugging into Windows Azure Active Authentication and third-party MFA providers. This is also seen in more nuanced behaviour with respect to authentication within the product, reflected in greater flexibility in access control decisions.

            With AD FS now built directly built on top of HTTP.SYS, a lot of changes  are abstracted from the user through the new MMC UI and also PowerShell. Nonetheless, it’s worthwhile familiarizing ourselves with kernel mode elements, as they serve a useful role in basic service troubleshooting/configuration . The NETSH HTTP command can be used to query and configure http.sys.

            The netsh http show urlacl command can be used to list URL reservations that AD FS makes within http.sys.  Here we can see the /adfs/ path reserved for use.


                Reserved URL            : https://+:443/adfs/

                    User: NT SERVICEadfssrv

                        Listen: Yes

                        Delegate: Yes

                        SDDL: D:(A;;GA;;;S-1-5-80-2965554544299-213434830-363436364-117610243-975697593) 


            And there’s this new guy, the Device Enrolment server, whose role becomes more apparent should we wish to make use of new Windows 8.1/iOS client (mobile) integration features.

                Reserved URL            : https://+:443/EnrollmentServer/

                    User: NT SERVICEdrs

                        Listen: Yes

                        Delegate: Yes

                        SDDL: D:(A;;GA;;;S-1-5-80-1321940109-3370001082-3650459431-215109509-2472514016)


            SSL bindings can be reviewed using the netsh http show sslcert command. The AD FS server in this demo setup I’ve created is sts.adfs2.net.

            PS C:Windowssystem32> netsh http show sslcert


            SSL Certificate bindings:

            ————————-


                Hostname:port                : sts.adfs2.net:443

                Certificate Hash             : 1f54c1c62b057dscffgb1aec2b2cbd0876e5c559

                Application ID               : {5d89a20c-beab-4389-9447-324788eb944a}

                Certificate Store Name       : MY

                Verify Client Certificate Revocation : Enabled

                Verify Revocation Using Cached Client Certificate Only : Disabled

                Usage Check                  : Enabled

                Revocation Freshness Time    : 0

                URL Retrieval Timeout        : 0

                Ctl Identifier               : (null)

                Ctl Store Name               : AdfsTrustedDevices

                DS Mapper Usage              : Disabled

                Negotiate Client Certificate : Disabled


                Hostname:port                : localhost:443

                Certificate Hash             : 1f52c0d62b0570c6a26c7fec2b2cbd0876e5bc59

                Application ID               : {5d89a20c-beab-4389-9447-324788eb944a}

                Certificate Store Name       : MY

                Verify Client Certificate Revocation : Enabled

                Verify Revocation Using Cached Client Certificate Only : Disabled

                Usage Check                  : Enabled

                Revocation Freshness Time    : 0

                URL Retrieval Timeout        : 0

                Ctl Identifier               : (null)

                Ctl Store Name               : AdfsTrustedDevices

                DS Mapper Usage              : Disabled

                Negotiate Client Certificate : Disabled


                Hostname:port                : sts.adfs2.net:49443

                Certificate Hash             : 2f5c41c62b0570c6a26c7fec21d2d0876e5c559

                Application ID               : {5d89a20c-beab-4389-9447-324788eb944a}

                Certificate Store Name       : MY

                Verify Client Certificate Revocation : Enabled

                Verify Revocation Using Cached Client Certificate Only : Disabled

                Usage Check                  : Enabled

                Revocation Freshness Time    : 0

                URL Retrieval Timeout        : 0

                Ctl Identifier               : (null)

                Ctl Store Name               : (null)

                DS Mapper Usage              : Disabled

                Negotiate Client Certificate : Enabled


            Location-wise, the AD FS application files themselves are no longer held under C:Program FilesActive Directory or C:Program Files (x86). Instead, they’ve moved to C:WindowsADFS. For clarity, this was actually a change instigated first in Windows Server 2012 with the Active Directory Federation Services (AD FS) 2.1 role.  In this folder is the Microsoft.IdentityServer.Servicehost.exe.config file, where, as admins, we’ll be spending more time in the future in order to activate debug functions. From this file all trace options for various services and endpoints can be enabled. In the same folder is a configuration file for the new Device Registration service (DRS), responsible for activation and enrolment of controlled devices and represented by a new (Win8/IOS *) schema class in Active Directory Domain Services (AD DS). The file in question is called   Microsoft.DeviceRegistration.ServiceHost.exe.config. 

            Support for the new Device class requires a schema change to Active Directory. For those upgrading an existing Windows setup, the appropriate files can be found on the R2 installation CD under D:SupportADPrep.  From what I’ve seen/tested thus far, to support the new release, you’ll need at least one Windows Server 2012 domain controller, preferably two in any serious deployment scenario. This requirement stems from the use of Group Managed Service Accounts (GMSA) that are generated and maintained by the Key Distribution Service (KDS) on 2012 domain controllers. The new version of AD FS makes use of these GMSA accounts, defined during AD FS installation, that are then shared amongst connecting AD FS hosts. I suggest reading the following backgrounder and bear in mind that the AD FS Windows Server 2012 preview  labs incorporate a workaround for testing purposes, in activating the root key, that is not recommended for production environments.

            Update 29/10 –  SamD from the AD product team added that “gMSA is not required to be the service account that ADFS runs on. It is an additional optimization that is available to customers if they have Win2012 domain controllers available.” The traditional service account option is available during installation.

            Moving on, let’s take a look at the “broader” access audience that the new version emphasises. This can be immediately seen by viewing the claims descriptions list surfaced on a new AD FS installation.

            clip_image002

            There are around 40 new claims descriptions available in the AD FS Windows Server 2012 R2 release. As we’ll see, use of these new claims types allow us to make more refined assessments concerning  access to web applications and resources.

            Workplace Join / Bring Your Own Device (BYOD)

            Through the new Workplace Join feature within R2, AD FS becomes a focal point for mobile access in the enterprise and an integral component in the Microsoft Bring Your Own Device (BYOD) vision. Workplace Join allows hitherto unmanaged/untrusted operating systems such as Windows RT/Windows 8 and IOS to be moved into a more controlled access context, by allowing their registration and affiliation with Active Directory. Devices will register with Active Directory through a Device Registration Service (DRS) and subsequently use an X509 certificate bound to the user context(s) on that machine for device authentication. In a default configuration, users will login via AD FS to initiate the join process using their AD credentials.  To further secure this process, additional factors can be also used with Windows Azure Active Authentication (PhoneFactor) or a third-party authentication provider exposed through the new AD FS MFA SDK.

            Devices that are workplace-joined emit additional claims during the logon process. These include:

            clip_image004

            Certificate support in claims handling has also been enhanced.

            clip_image006

            Windows 8.1

            In order to provide a comparison between old and new with Workplace Join, I began by looking at what claims (and any new ones) are processed from a vanilla Windows 8.1 Pro domain-joined machine, using a simple WS-Federation relying party to validate claims emitted the client and AD FS components.

            Firstly via the internal network and the AD FS farm using Internet Explorer. Here the browser uses Integration Windows Authentication/Negotiate and the user silently accesses to the WIF relying party via Kerberos. The usual configuration caveats apply here: the URL of the AD FS and RP instance are in the Local Intranet Zone of IE.

            image

            To demonstrate a new change, I installed Mozilla Firefox and repeated the logon process. Instead of the Integrated Windows Authentication (IWA)/Negotiate process, the user is presented with a forms sign-in page. This represents a departure from the user experience and behaviour in AD FS 2.0. With the latter,  authentication would be downgraded to NTLM,  because IWA was assumed in the farm configuration and the browser needed to be configured to explicitly support Kerberos for seamless login. Where the latter action was not performed,  the user would receive an NTLM challenge/response prompt, often causing confusion. With the new release, support for IWA is now governed through setting registering User Agent types within AD FS that are capable of supporting Negotiate. Out of the box, this is constrained to IE, meaning any other browser will revert to using forms logon when accessing resources from an internally connected client . Here we see the claims output from a Firefox login:

            image

            In internal login scenarios (IE/Firefox), we see new claims types emitted concerning location (whether the login request is sourced within the Corporate Network), an Application Identifier (corresponding to the Relying Party Identifier), the Client source IP (or translated) address, an Authentication Method Reference and a Client Request ID.

            Then, via an external network through the new Web Application Proxy:

            image

            In addition to those claims types mentioned earlier is a new claims type for the client forwarded IP (x-ms-forwarded-client-ip) processed at the Web Application Proxy. The insidecorporatenetwork value  is now set to false, as we’re on an outside network.

            You may have observed at this point that there are no Device claims. This makes sense if we consider that their use is limited to client types that declare them, i.e. only workplace-joined clients currently make use of the Device class.  

            Onto the workplace join process itself. To get your test lab up and running, I recommend reading this TechNet article.

            If you follow the lab guide carefully, and, in particular, with emphasis on getting the dependent infrastructure working correctly, then with a little patience and time, you’ll be up and running. I tried this with the basic contoso.com lab setup (a good starting point) and then expanded this in new setup using my own test domain. There are a few gotchas worth pointing out, hoping that you’ll avoid my growing pains …

            1.      Don’t use Cryptography Next Generation (CNG) algorithms when configuring your AD Certificate Services. They won’t work.

            2.      For simplicity in your CA configuration, I’d opt for use of HTTP Distribution endpoints, particularly if you intend to test “outside” configurations using the Web Application Proxy. Ensure the Certificate Revocation List (CRL) on the Certificate Distribution Point (CDP) and your Authority Information Awareness (AIA) URLs are setup correctly and reachable from the Win 8.1 client. If you’re using Delta CRLs and IIS as the web server for your CDP, don’t forget to allow Double Escaping on IIS in the Request Filtering section.

            3.      Ensure the Enterprise CA is trusted by the client and the certificate is installed in the Trusted Root Authorities section of the client. Importing the cert via the AIA endpoint is a good way of testing its availability and installing the certificate. Again, the certificate distribution point (CDP) URLs should be visible to the client.

            4.      Issue the AD FS certificate, complete with SAN for the Device Registration Service (DRS), before you begin your AD FS setup. The common name (CN) on the certificate should be the AD FS URL and two Subject Alternate Names (SAN) entries should contain the AD FS URL and one for the Device Registration Service (DRS) provided. For example, I’ve used an example using the MMC snap-in Certificate Request wizard, based on a copy of the default Web Server template for a common name of sts.mydomain.com for the FQDN URL of the AD FS service and also as the first Subject Alternate Name (SAN) entry. A second SAN entry is used for the DRS endpoint, enterpriseregistration.mydomain.com.


            clip_image010         

            5.      As posted on the Technet forums (in the current R2 preview), both the AD FS server and the Windows 8.1 client need to be configured with time-zone of UTC 0:00 or less. My setup is using Pacific Time (UTC -8:00). Don’t ask me, I just blog here J

            6.      Don’t forget to enable Device Authentication in Global Primary Authentication settings within the UI or via PowerShell.

            7.      Use the Event Log Microsoft|Workplace Join to troubleshoot!! Here’s a collage of  first-hand events to illustrate it’s effectiveness in troubleshooting:


            clip_image011

            URL (enterpriseregistration.xxxx.yyyy) cannot be resolved or reached.


            clip_image013

            Can’t reach the CRL CDP of the AD CS endpoint.


            clip_image014

            Root Authority is not trusted by the client.


            clip_image015

            This message is stating a number of possible issues (generally bad):


            o   DRS Configuration and Activation was not completed successfully

            o   Issues with the SAN on the SSL certificate

            o   AD FS Device Authentication has not been enabled


            Once you start seeing messages like the following, you’re almost there.


            clip_image016


            clip_image017

            Nice.


            8.       Take particular note of any errors reported when trying to activate Device Registration Service; namely anything  along the lines of:

            WARNING: UPN values that are not included in the SSL certificate have been found in the enterprise. Users with these UPN suffix values will not be able to register their devices. To enable users with the corresponding UPN suffix to register their devices, provide a new SSL certificate containing the values listed below in the subject or subject alternative name.

            enterpriseregistration.upn1.contoso.com
            enterpriseregistration.upn2.contoso.com

            In the case of (8), I’d made the mistake of not registering the appropriate certificates with Subject Alternate Names (SAN) that included the DeviceRegistration CNAME record. Simply re-issuing the AD FS service certificate afterward, setting Manage Private Keys etc. and re-activating DRS in PowerShell was not sufficient to get the configuration working.

            The Workplace Join function can be accessed by first accessing the Change PC Settings option on the Windows 8 UI

            clip_image019

            In PC Settings, choose the Network option

            Then select Network followed by the Workplace option:

            clip_image021

            If your configuration is working, certificates are trusted, appropriate AD FS and PKI endpoints are reachable, stars are in alignment (just joking), then clicking on the Join button leads to AD FS responding with a challenge:

            clip_image023

            Enter the Active Directory credentials for the user. In this example I’m using, the device is joining a test domain called adfs2.net. Note the AD FS URL (connecting to my R2 instance sts.adfs2.net) at the top of the page. For the auto-discovery of the AD FS Device Registration Endpoints (DRS) a CNAME (Alias) record in DNS needed to be created for the service called enterpriseregistration.adfs2.net. This record points to the host (A) record of the AD FS federation service internally. This allows the discovery process to find the DRS endpoint and in an external setting this would point to the Web Application Proxy,  your own Reverse Proxy or other suitable edge device.

            The relying party (RP) for the Device Registration Service is created during the DRS activation process, so there’s nothing additional required on this side.

            clip_image024

            Connecting Windows 8.1 clients will use the auto-discover function by matching the domain suffix of the user account provided during the join process against the enterprise registration CNAME record for that domain. The join process then attempts a call to the enrollment server web service. Using the adfs2.net domain as an example, the following endpoint is queried:

            https://enterpriseregistration.adfs2.net/EnrollmentServer/contract?api-version=1.0

            If the service can be reached successfully, the join process is initiated.

            clip_image028

            The process is now completed and the “join” associated with the Windows 8.1 user profile. I used a Microsoft Live ID account and as can be be seen from the above screenshot, a subsequent AD user called demo with a UPN of demo@adfs2.net,in doing so  providing my AD credentials during the Join. Please note that the Active Directory domain I’m using is also called adfs2.net (dc=adfs2,dc=net) for convenience. In a real-world/production scenario, the DNS domain names used for Active Directory and that of the federation service itself may be different.

            The user account is then issued with a self-signed  X509 certificate with an Extended Key Usage (EKU) of Client Authentication. Jumping into the Certificates|User snap-in we see a certificate issued under the user context.

            clip_image029

            Back to the WIF 3.5 relying party (RP), logging on to the RP from the outside we get redirected to AD FS for logon. Upon successful logon, the following claims are shown.

            image

            With the Win 8.1 device now connected to the AD domain via a Workplace Join, we see additional claims consummated.

            ·         IsRegisteredUser

            ·         OS Version

            ·         OS Type

            ·         Identifier (Subject name of the cert)

            ·         Display Name (corresponding to the Device Name)

            ·         Registration ID (corresponding to an OU served up in the certificate)

            The device itself is registered within Active Directory at the following location: CN=<Device ID>,CN=RegisteredDevices,DC=mydomain,DC=com.

            Here’s an example with a SAML 2.0 Service Provider (SimpleSAMLphp), with a Workplace Joined Windows 8.1 client connecting to it.

            Inside the corporate network, we see the following:

            clip_image033

            As tempting it is to delve further into authentication, I’ll refrain from doing so and leave this to a follow-up post. My apologies, otherwise this post will reach biblical proportions in length and we’ll be shaking hands with Santa Claus before we know it.

            iOS devices

            From testing, the auto-discover function using the enterpriseregistration CNAME record in DNS, described in the previous section, is limited to the workplace join process for Windows 8.1. iOS clients must directly connect to AD FS to initiate the join process. The endpoint settings on the DRS Relying Party refer to a URL of:

            https://sts.adfs2.net/Enrollment Server/otaprofile/

            This is the DRS Over-the-Air endpoint for non-Windows devices (currently iOS only).

            I used an iPad 3 running iOS 6.1.3 for this exercise. If you plan on using self-signed certificates for this type of testing, you’ll need to use the iPhone Configuration Utility to create a profile which can be then used to install the root certificate from your Certificate Services Issuing CA (and any optional chain).

            If you’re testing iOS or Windows 8.1 devices in an external setting, it’s worth mentioning that the Web Application Proxy (WAP), which I’ll cover in a moment, doesn’t provide an HTTP Reverse Proxy function. To ensure that any CRL/AIA distribution points are visible in an “outside” testing context, I elected to install IIS on the WAP, publish the CRL/AIA Certificate Distribution Points (CDP) via a UNC from the CA itself to be made available as an HTTP URL on the Web Application Proxy via IIS, making the distribution points reachable from an external perspective. Clearly, this is not something one would do automatically in a production environment, without a bit of forethought, but it works well in a demo environment. You can probably also do this with a kernel mode only approach, but I didn’t have time to test this (yet).

            Once the Apple configuration file (.mobileconfig) file had been deployed onto my iPad (via e-mail), a Profile containing the Root certificate was generated and the certificate installed.

            clip_image035

            clip_image037

            With the root certificate or chain correctly installed, going to the AD FS server URL, we should not receive any SSL errors or warnings in the browser, indicating that the chain and CRL/AIA distribution points are reachable. To test this, you can use the IdP initiated sign-on page in the default setup, e.g. https://YOURFQDN/adfs/ls/idpinitiatedsignon.aspx.  From the iPad, here’s the portrait view of the page.

             clip_image039

            Playing around, I turned the iPad on its side and we get an automatically resized window. This is a nice feature in the new UI in AD FS 2012 R2 that supports dynamic adjustment and positioning of elements through CSS, resizing pages accordingly across various devices and user agents (think mobile client).

            clip_image041

            In order to kick off the Workplace Join, we point Safari to the endpoint DRS mentioned earlier:

            https://sts.adfs2.net/Enrollment Server/otaprofile/

            This redirects the browser to a sign-in page where we need to logon with the AD account that will be bound to the iOS device for the workplace join.

            clip_image043

            Logging on with the demo@adfs2.net account I used in the Windows 8.1 example, the Safari page remains open in the background and the foreground switches to the install profile option on the mobile device.

            image

            The install profile option and Workplace Join install option appears:

            clip_image047

            Clicking on the More Details option, we can see that the AD FS Token Signing Certificate (public key) and the Device Enrollment Encrypted Profile Service are referenced during the profile installation.

            clip_image049

            Clicking on Install Profile

            clip_image051

            Once the profile is installed we see a Certificate issued to the device, issued with a common name of MS-Organization-Access, as per the Windows 8.1 join process.

            clip_image053

            Returning to the profile screen we see the completed Workplace Join profile

             clip_image055

            NB: The Demo Auth360 profile is the imported .mobileconfig containing the root certificate from earlier.

            Web Application Proxy

            Sitting in front of the AD FS farm is a new optional role, similar to the AD FS Proxy in AD FS 2.0, called the Web Application Proxy. This is a completely redesigned component, built to cater for federation services scenarios as well additional access scenarios beyond those seen in AD FS 2.0. 

            As with DirectAccess in Windows Server 2012, more roles are being moving into the mainstream product and the Web Application Proxy is a module in the Remote Access role within Windows Server 2012 R2.

            clip_image056

            Configuration of the proxy itself also moves to the Remote Access Management snap-in.

            clip_image057

            A configuration wizard is provided to connect the proxy to the back-end AD FS farm and a service account is required to register with the AD FS server(s) during installation. This service needs to be a member of the local administrators group on the AD FS farm.

            Once connected to AD FS, a number of simple options are available for configuration.

            clip_image059 

            The UI is at this stage is admittedly basic, but as with DirectAccess in 2012, there’s a greater emphasis on using wizards to get the job done and whatever can be done in the UI can be done (and more) via PowerShell; a PS configuration script is provided as a summary at the end of each publishing wizard rule to demonstrate this point.

            As with TMG/UG we can publish/proxy a particular URL or URIs/paths of that URL expressed as separate publishing rules on the proxy , e.g.

            www.mydomain.com/ (as one allow all rule) versus

            www.mydomain.com/app1/ as Rule#1

            www.mydomain.com/app2/ as Rule#2

            www.mydomain.com/app3/ as Rule#3

            An interesting under-the-covers capability is support for Server Name Indication (SNI).  SNI, initially provided in Windows Server 2012, allows for multiple certificates to be bound to a single IP listener. Prior to IIS 8.0/SNI, sharing IP addresses amongst multiple websites was limited to the network endpoint and their IP:Port binding. SNI is a TLS extension that provides the hostname of the server the client is connecting to during handshaking. This allows much greater flexibility when configuring the proxy. With the move to kernel-mode, all the hard lifting is done through the UI or via PowerShell. familiarity with NETSH HTTP will also assist in any troubleshooting or ad-hoc configuration. The majority of browsers support SNI, although Windows XP in any configuration using Internet Explorer does not.

            The current preview of the proxy in the R2 release provides for connections as:

            1.       A reverse web proxy, connecting to back-end servers via HTTPS;

            2.       A pre-authentication web proxy, connecting to AD FS via HTTPS to validate credentials

            a.       For claims aware web applications

            b.      For non-claims aware web applications using Kerberos

            When we publish a new AD FS compatible application (pre-authentication), the proxy pulls the RP list/ configuration from the AD FS farm. Polling is done (looking at the event logs) every minute.

            Using a Windows Identity Foundation (WIF) test relying party application from another test domain (psid.local),  here’s an example of a publishing rule:

            Add-WebApplicationProxyApplication -BackendServerUrl ‘https://rp.psid.local/app9/’ -ExternalCertificateThumbprint ’91D8014979B9CDEF9C907171F7CE9AF398E66DC6′ -ExternalUrl ‘https://rp.psid.local/app9/’ -Name ‘WIF Test Application’ -ExternalPreAuthentication ADFS -ADFSRelyingPartyName ‘WIF 3.5 Application’

            This is a pre-authentication rule, meaning that AD FS process the login request, UI surfaced and  validates access and authentication credentials through the proxy via a back-channel connection before access to the relying party is processed.

            To complete this round of testing, I wanted to validate Workplace Join from an “outside” network via the proxy. DRS endpoints are automatically published, meaning no specific additional publishing rules needed to be created.

            On the Windows 8.1 client, I removed the client from the Join agreement created earlier in order to re-attempt the join via the proxy from the external network. When we attempt a join again from the “outside” via the Web Application Proxy, clicking on Join generates the following page.

            clip_image065

            The user ID is automatically populated in the form, carried over from the Join request.

            Testing from the “outside” now, when we access our WIF application RP from our Workplace Joined client (via the Web Application Proxy), we’re served up with a sign-in form.

            clip_image067

            That’s expected as we’re now an Extranet client (using MS terminology). This is confirmed by looking at the base AD FS configuration and the primary authentication provider serving up forms login for external clients.

            clip_image068

            “Extranet” users are automatically assigned to the forms authentication sign-in process, whereas Intranet users are assigned Windows Authentication, browser considerations notwithstanding. For those familiar with fiddling with Local Authentication Types in web.config on the AD FS proxy/farm in AD FS 2.0, making this available through the UI and Powershell is a boon J

            Going back to our relying party application, we can see in the produced claims that the client connection is not through the corporate network and is via Web Application Proxy using the following claims:  

            http://schemas.microsoft.com/ws/2012/01/insidecorporatenetwork

            http://schemas.microsoft.com/2012/01/devicecontext/claims/isregistereduser

            clip_image070

            The client is outside the corporate network and the user is now registered. As a simple test, if we only want to allow Registered Users access to our RP claims web application, we could do this through an Authorization Rule that states that only Registered Users are permitted access:

            c:[Type == “http://schemas.microsoft.com/2012/01/devicecontext/claims/isregistereduser&#8221;, Value =~ “^(?i)true$”] => issue(Type = “http://schemas.microsoft.com/authorization/claims/permit&#8221;, Value = “PermitUsersWithClaim”);

            Logging on with a non-workplace joined client from outside the corporate network, we are denied access.


            clip_image072

            Error pages are customizable and that’s something we’ll cover in Part 3.

            As I touched on earlier, we can use SSL bridging scenarios incorporating wildcard certificates on the front-end (proxy) and named certificates (on the back-end) in publishing scenarios. The pre-authentication parts allows integration with claims and non-claims aware (Kerberos) applications. Applications such as Exchange, which are not claims-aware or non-SAML kerberos claims SharePoint web applications can be configured via the Web Application Proxy. From testing rich client applications such as ActiveSync and Outlook, which use Basic/NTLM application, these are not currently supported on the Web Application Proxy either in a pre-authentication or pass-through capacity. The proxy defaults to SNI and this is not supported by some mail clients.  We’ll cover this and other authentication scenarios in Part 2.

            Just to wrap up, here are some observations from testing:

                    The proxy can translate host names in URLs but not path names. Make sure that the published path matches that of the application;

                     There’s no Edit function in the UI once you’ve created a publishing rule;

                     The Web Application Proxy is currently HTTPS only, so no HTTP publishing. Hopefully this will be corrected in the near future as scenarios such as CRL/CDP publishing, which use HTTP are not supported in Reverse Proxy scenarios today. Meanwhile, HTTPS-HTTP bridging, sometimes used in Kerberos Constrained Delegation (KCD) scenarios with TMG/UAG are also not possible as AD FS is HTTPS only.

            Extranet Soft Account Lockout

            Extranet soft account lockout imposes an option to temporarily lockout “extranet-connected” accounts, via the Web Application Proxy, by not incrementing the AD BadPassword count on the PDC Emulator in AD once the soft lockout threshold is set in AD FS.  If the latter is reached, further logon requests are not passed to AD so that AD Password Policy “hard” lockout measures are not immediately triggered.  As the name suggests, this is a soft lockout option that is governed by use of an observation/sliding window that determines how often in a given period a user may attempt to logon via the proxy before the soft count is reached. The goal here is to frustrate password guessing attempts via brute force/DoS from the outside by nefarious users.

            Update 29/10 –  SamD from the AD product team mentioned that the extranet lockout feature was also done with the view that customers with ADDS account lockout policies can prevent DOS attacks on specific user accounts by setting a threshold lower for the ADFS extranet lockout policy. This way the user still has internal access because ADDS has not locked out the user.

            Soft Account Lockout can be invoked through the use of PowerShell.

            $observationwindow = New-Timespan -Minutes 1

            Set-ADFSProperties –ExtranetLockoutThreshold 3 -EnableExtranetLockout $true -ExtranetObservationWindow $observationwindow

            Once set, we can see via Get-ADFSProperties, the changes applied:

            ExtranetLockoutThreshold              : 3

            ExtranetLockoutEnabled                : True

            ExtranetObservationWindow             : 00:02:00


            Here we’ve set the lockout threshold to three attempts with an observation window of two minutes.

            From a testing standpoint, In the demo AD Domain setup, “hard” account lockout is not set via GPO.

            clip_image074

            Attempting to login at the RP WIF test application, we’re redirected to  AD FS for logon. I enter an incorrect password.

            clip_image076

            The PDC Emulator FSMO role in AD, which monitors the bad password count (badPwdCount) increments by 1, likewise on the second and third bad password attempts.

            I entered a bad password five times in successive attempts. Continued attempts to logon with a bad password, once the observation window kicks in fails to increment the count beyond three for the windowed period of  two minutes. Once the window has elapsed, the bad password account is again incremented.

            clip_image077

            One of the nicer aspects of this setting is that it applies to all endpoints, be they passive or active in nature. This is particularly relevant as it also applies to web services (WS-Trust) endpoints for rich clients, e.g. Office 365.

            Lost Device Protection

            As covered earlier, devices registered via Workplace Join are registered within Active Directory in the container CN=<Device ID>,CN=RegisteredDevices,DC=mydomain,DC=com. Lost devices can be denied access by disabling or deleting the appropriate object within AD (I moved the device objects to another OU to test this). Access through AD FS is immediately revoked for the workplace joined client.

            From testing thus far, devices joined, left and re-registered via Workplace Join are not currently cleaned up within the RegisteredDevices container. Some PowerShell scripting is currently required to enforce this and I would imagine some changes by GA or some scripts made available to manage this process.

            Summary

            A very long post comes to an end.  Next up, we’ll look at UI changes and authentication/access in greater detail and there’s LOTS to cover. As ever, please feel free to comment, contribute, correct and I’ll get back to you!